So, you've got a fantastic JPG image—maybe a beloved pet, a custom logo, or a beautiful piece of art—and you're dreaming of seeing it stitched out on fabric by your embroidery machine. It's an exciting creative leap! But here’s the snag your machine speaks a very specific language, and for many Brother embroidery users, that language is the JEF file format. Your standard JPG picture file and a JEF embroidery file are worlds apart. One is a grid of colored pixels; the other is a complex set of instructions telling your machine exactly where to place each stitch, what color thread to use, and in what order. Bridging that gap requires a bit of digital magic known as digitizing. Finding the best ways to convert JPG to JEF format is the crucial first step in your embroidery journey.
Understanding the Journey: It's More Than a Simple Conversion
First things first, let's set the right expectation. What you're looking to do isn't a simple "file conversion" like changing a DOC to a PDF. Think of it more like translating a photograph into a detailed, step-by-step recipe for a chef (your embroidery machine). This process is called embroidery digitizing. A JPG is passive; it just shows an image. A JEF file is active; it commands the machine. It contains data for stitch types (satin, fill, running), underlay, stitch direction, sequencing, and color stops. Trying to stitch a plain JPG directly would, at best, result in a poor outline and, at worst, could jam your machine. The goal is to create a clean, stitchable JEF file that brings your image to life in thread.
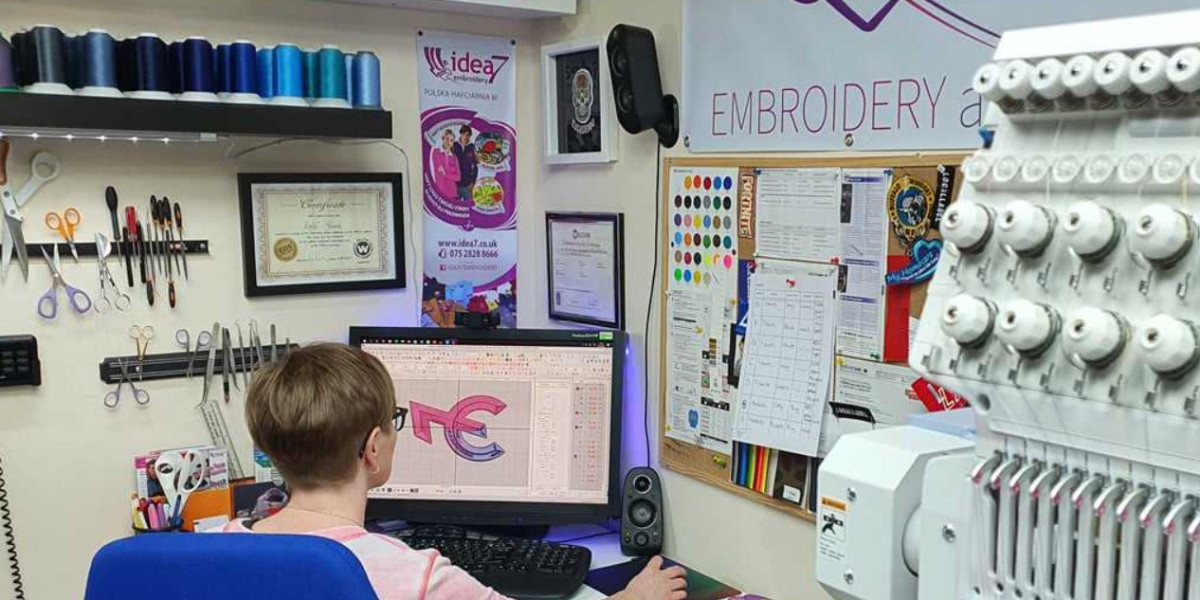
Method 1: Professional Embroidery Digitizing Software (The Power-User's Choice)
This is the gold standard for quality and control. Dedicated digitizing software, like Brother's own PE-Design, Embrilliance, Hatch, or Wilcom, is built specifically for this task.
- How it Works: You import your JPG image into the software, where it sits as a background template. Then, using the software's tools, you manually trace over the image, defining different areas (objects) and assigning stitch types to each. You'll decide where satin stitches go for text, what fill patterns to use for large areas, and how to optimize the stitch path for minimal trims and jumps.
- The Pros: Unmatched quality and customization. You can tweak every single stitch, perfect the density for your specific fabric, and create truly professional results. It allows for editing existing JEF files as well.
- The Cons: There's a significant learning curve. These programs are complex and can be expensive. Mastery takes time and practice. It's an investment—best for those serious about frequent or professional digitizing.
Method 2: Online Auto-Digitizing Services (The Quick & Convenient Route)
For hobbyists or one-off projects, online conversion services offer a tempting balance of speed and simplicity. Websites like this exist where you upload your JPG, choose some basic settings (like desired size and maximum number of colors), pay a fee, and receive a JEF file via email, often within hours.
- How it Works: These services typically use automated digitizing engines, sometimes with a human digitizer reviewing the output. You're essentially outsourcing the digitizing work.
- The Pros: Incredibly easy and fast. No software to buy or learn. Great for simple logos or designs without excessive detail. It lets you test a concept without deep commitment.
- The Cons: Results can be hit-or-miss, especially for complex images like photographs. Automated systems often overcomplicate designs with too many stitches or colors, leading to poor stitch-outs. You have little to no control over the final stitch parameters. Costs can add up per design.
Method 3: Freelance Digitizers (The Expert Outsourcing Option)
Sometimes, the best tool is another person's expertise. Hiring a freelance embroidery digitizer is a very popular and effective path.
- How it Works: You provide your JPG image and any specifications (size, fabric type, desired thread brand) to a freelancer on a platform like Etsy, Fiverr, or a dedicated digitizing marketplace. They use their professional software and skill to create a clean, optimized JEF file for you.
- The Pros: You get a professionally digitized file tailored to your needs without having to learn the software yourself. A good digitizer will understand stitch physics and can advise on simplifying your design for the best outcome. It's cost-effective for occasional projects.
- The Cons: You need to communicate clearly and may need to provide feedback or request revisions. Quality varies between freelancers, so check their portfolios and reviews. There's a turnaround time to consider.
Method 4: Embroidery Machine Built-in Tools (The Basic Starting Point)
Some modern Brother embroidery machines come with very basic onboard editing or lettering functions. A few might offer a simplistic "image-to-pattern" feature.
- How it Works: This is highly model-dependent. The process would involve loading the JPG from a USB onto the machine's touchscreen and using its limited tools to trace or convert.
- The Pros: It's immediately available with no extra cost if your machine has it.
- The Cons: Capabilities are extremely limited, suitable only for the simplest of shapes and text. The results are often rudimentary and not recommended for detailed images. It’s more of a novelty than a reliable method.
Tips for Success Before You Convert
No matter which method you choose, preparing your JPG image is half the battle for a great JEF file.
- Simplify Your Image: Embroidery thrives on clear, defined areas of color. Use basic photo editing software to increase contrast, clean up fuzzy edges, and reduce the number of colors. A simple, vector-like graphic works infinitely better than a detailed photograph.
- Choose the Right Design: Start with logos, bold line art, or silhouettes. Avoid gradients, tiny details, and very thin lines that won't translate well into stitches.
- Know Your Specs: Decide on your final hoop size and the fabric you'll use. This information is crucial for setting stitch density correctly, whether you're doing it yourself or instructing a freelancer.
- Test Stitch on Scrap Fabric: Always run a test of your new JEF file on a scrap piece of your project fabric. This reveals any issues with density, tension, or design integrity before you commit to the final piece.
Embarking on the project to convert JPG to JEF format opens up a world of personalized creation. Whether you invest time in learning professional software, leverage the convenience of an online service, or collaborate with a skilled freelancer, the key is matching the method to your project's needs and your own commitment level. Remember, a well-digitized file is the invisible foundation of every stunning piece of machine embroidery. With a prepared image and the right approach, you're well on your way to transforming those digital pixels into beautiful, tangible stitches. Happy embroidering